
Importing Prospects via CSV
To enable automated AI discovery and gap-filling, your CSV file must include a Company Name column along with either a website_url or a Location column.
The Conturalis Sales Agent allows B2B teams to bulk-import external lead lists via CSV. Once imported into your local CRM, you can selectively trigger the AI Sales Flow to conduct deep website audits, formulate targeted contact strategies, and generate tailored outreach scripts.
1. The CSV Ingestion Interface
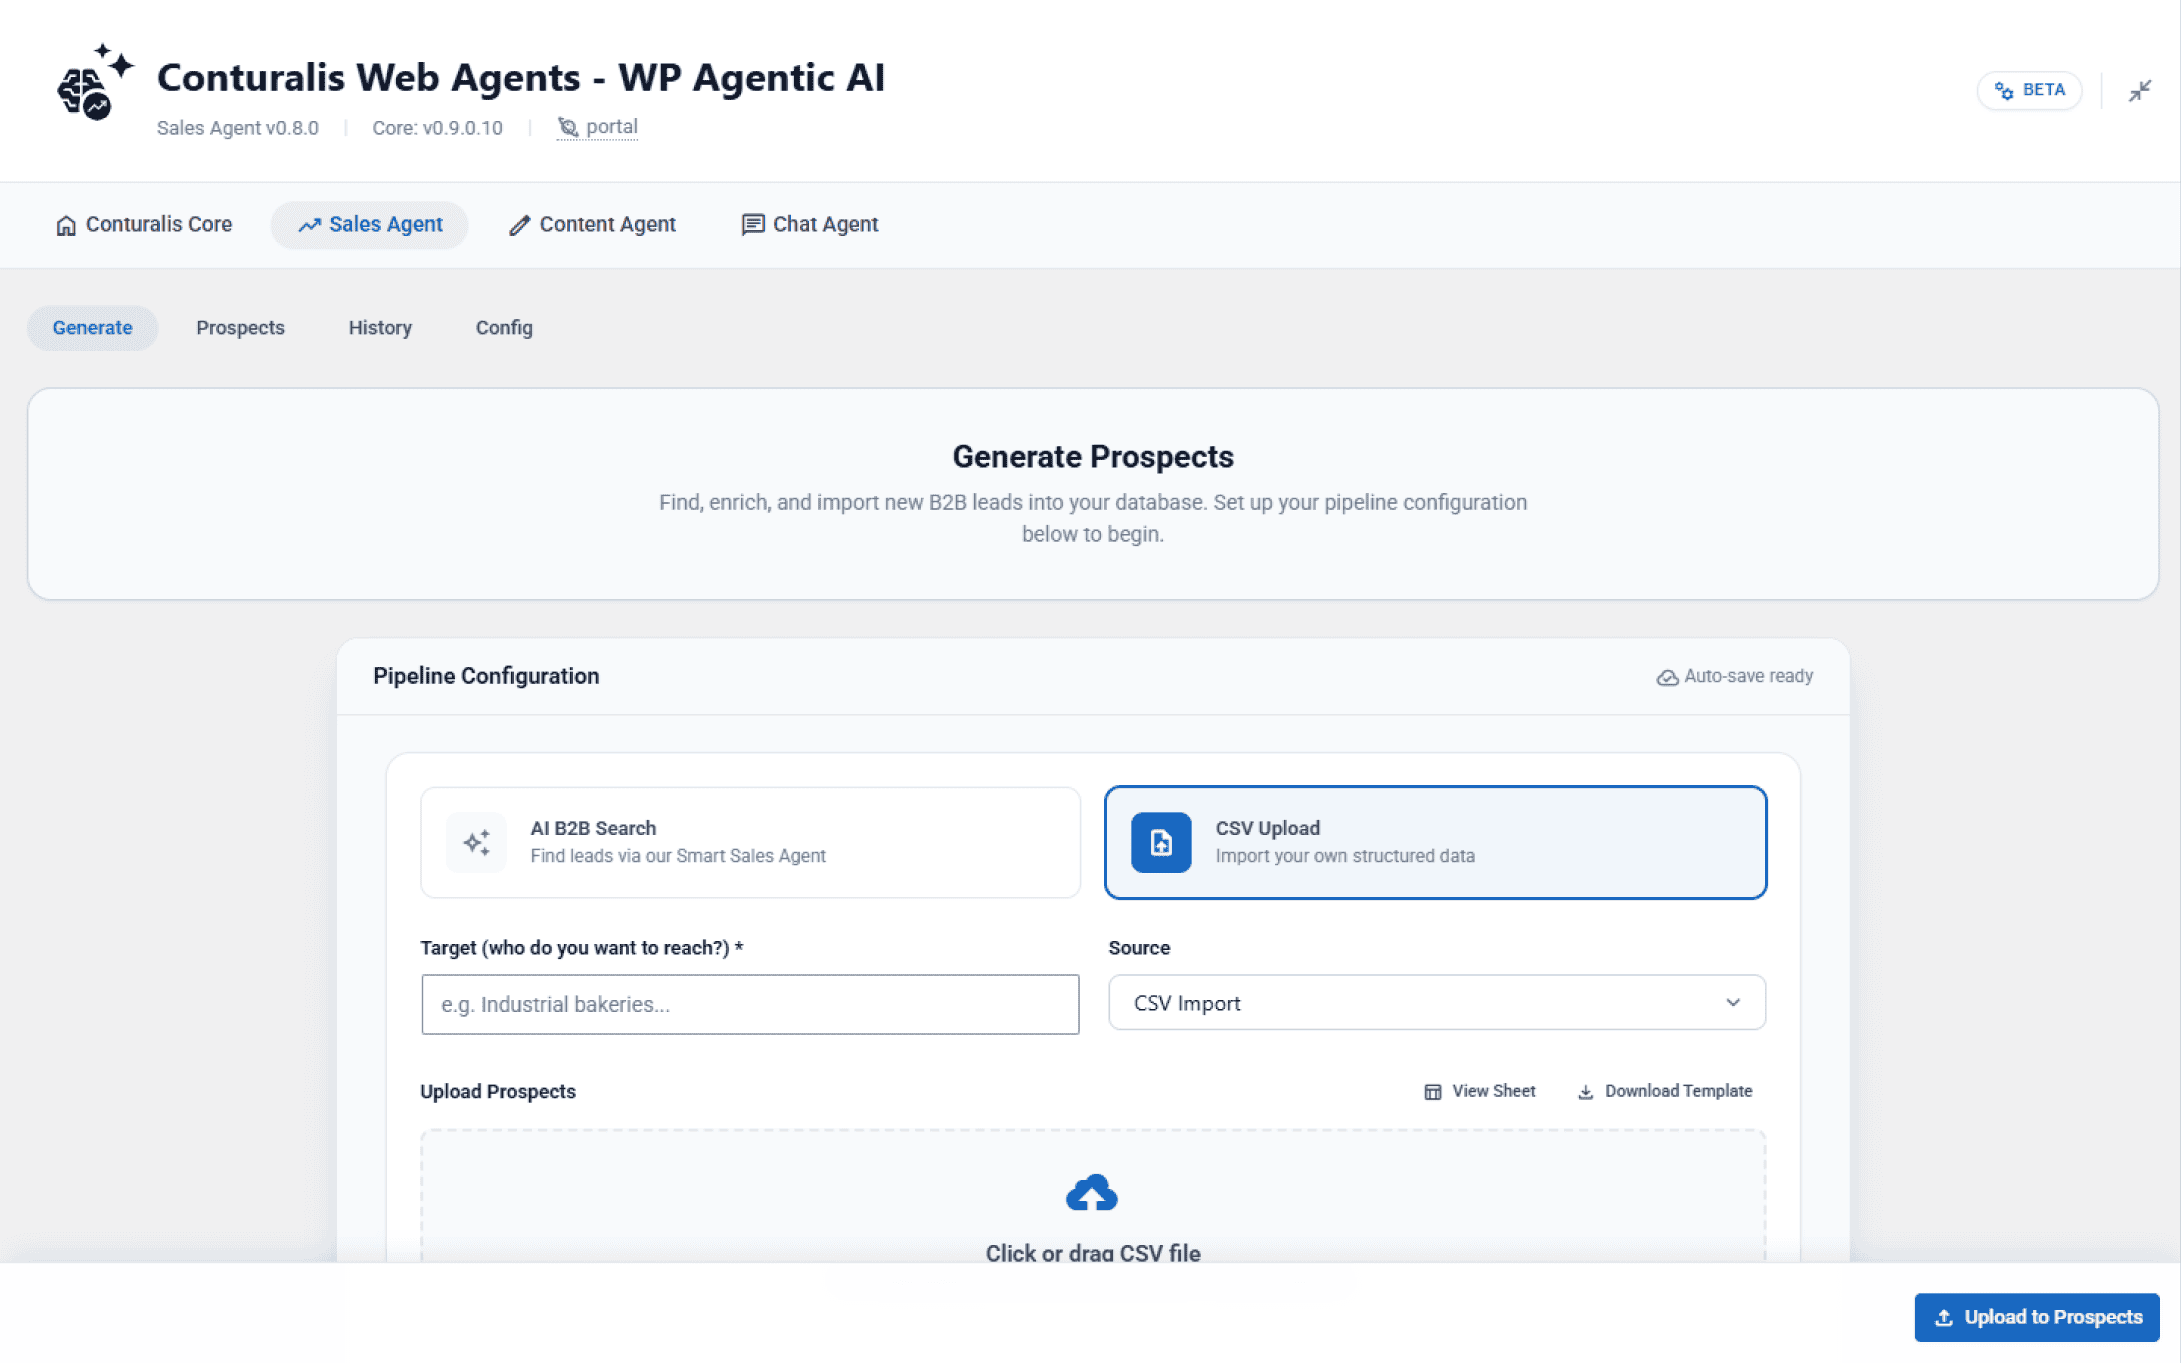
To begin importing leads, navigate to Conturalis → Agents → Sales Agent → Generate and switch the source method by clicking the CSV Upload radio card under Pipeline Configuration.
2. CSV Structure & Column Reference
You can structure your CSV using comma (,) or semicolon (;) delimiters. Standardize your columns according to our official template:
Open Official Google Sheets Template →
| Header Name | Required? | Description |
|---|---|---|
Company Name* |
Yes | The registered or trading name of the target business. |
website_url |
Conditional | Full URL (e.g., https://pixelcraft.be). If missing, Location must be provided. |
Location |
Conditional | City, region, or address. Used by the AI worker to find the website if omitted. |
contact1 |
Optional | Full name of the primary decision-maker or contact person. |
contact1_phone |
Optional | Direct phone number or switchboard line with country code. |
contact1_email |
Optional | Direct business email address. |
contact1_linkedin |
Optional | Personal LinkedIn profile URL of the contact. |
info_contact1 |
Optional | Job role, title, or internal department (e.g., Technical Director). |
Prospect Source |
Optional | Lead channel (e.g., Paid Ads, Cold Outreach, Events). Overrides the wizard dropdown. |
Notes |
Optional | Custom contextual notes, prior interactions, or specific pain points. |
3. Step-by-Step Upload Process
- Specify your Target (who do you want to reach?) to define the campaign context (e.g., "Companies that can improve their branding!").
- Select a Source channel from the dropdown (e.g., Paid Ads, CSV Import, Website Form).
- Drag and drop your
.csvfile into the drop zone, or click to browse. The filename and "Ready to upload" status will appear.
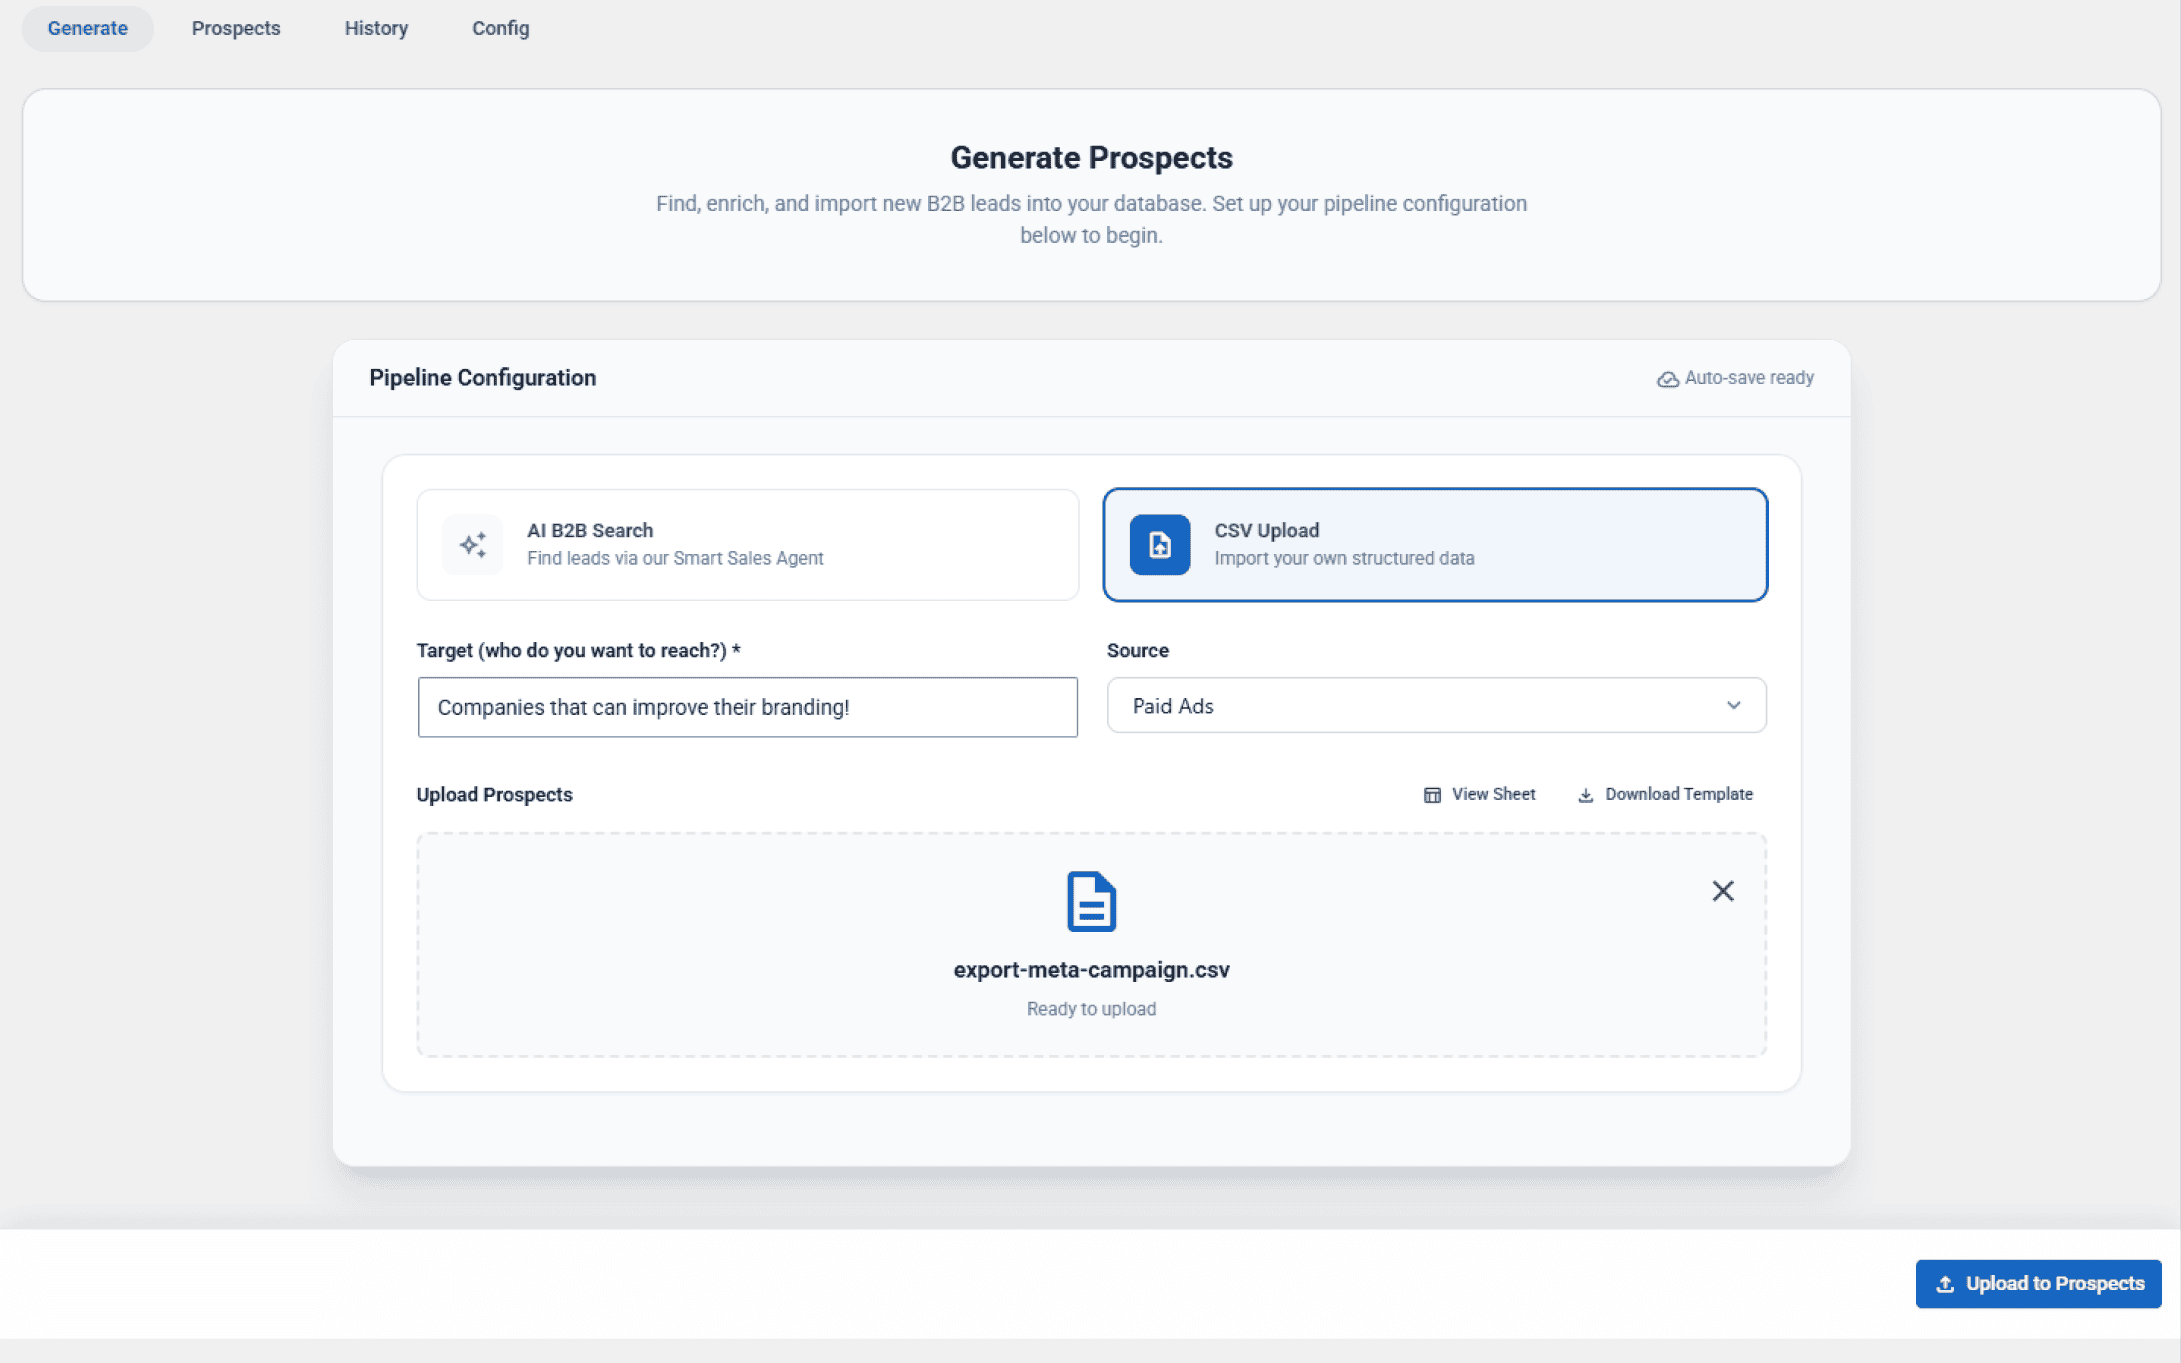
- Click Upload to Prospects in the sticky bottom bar.
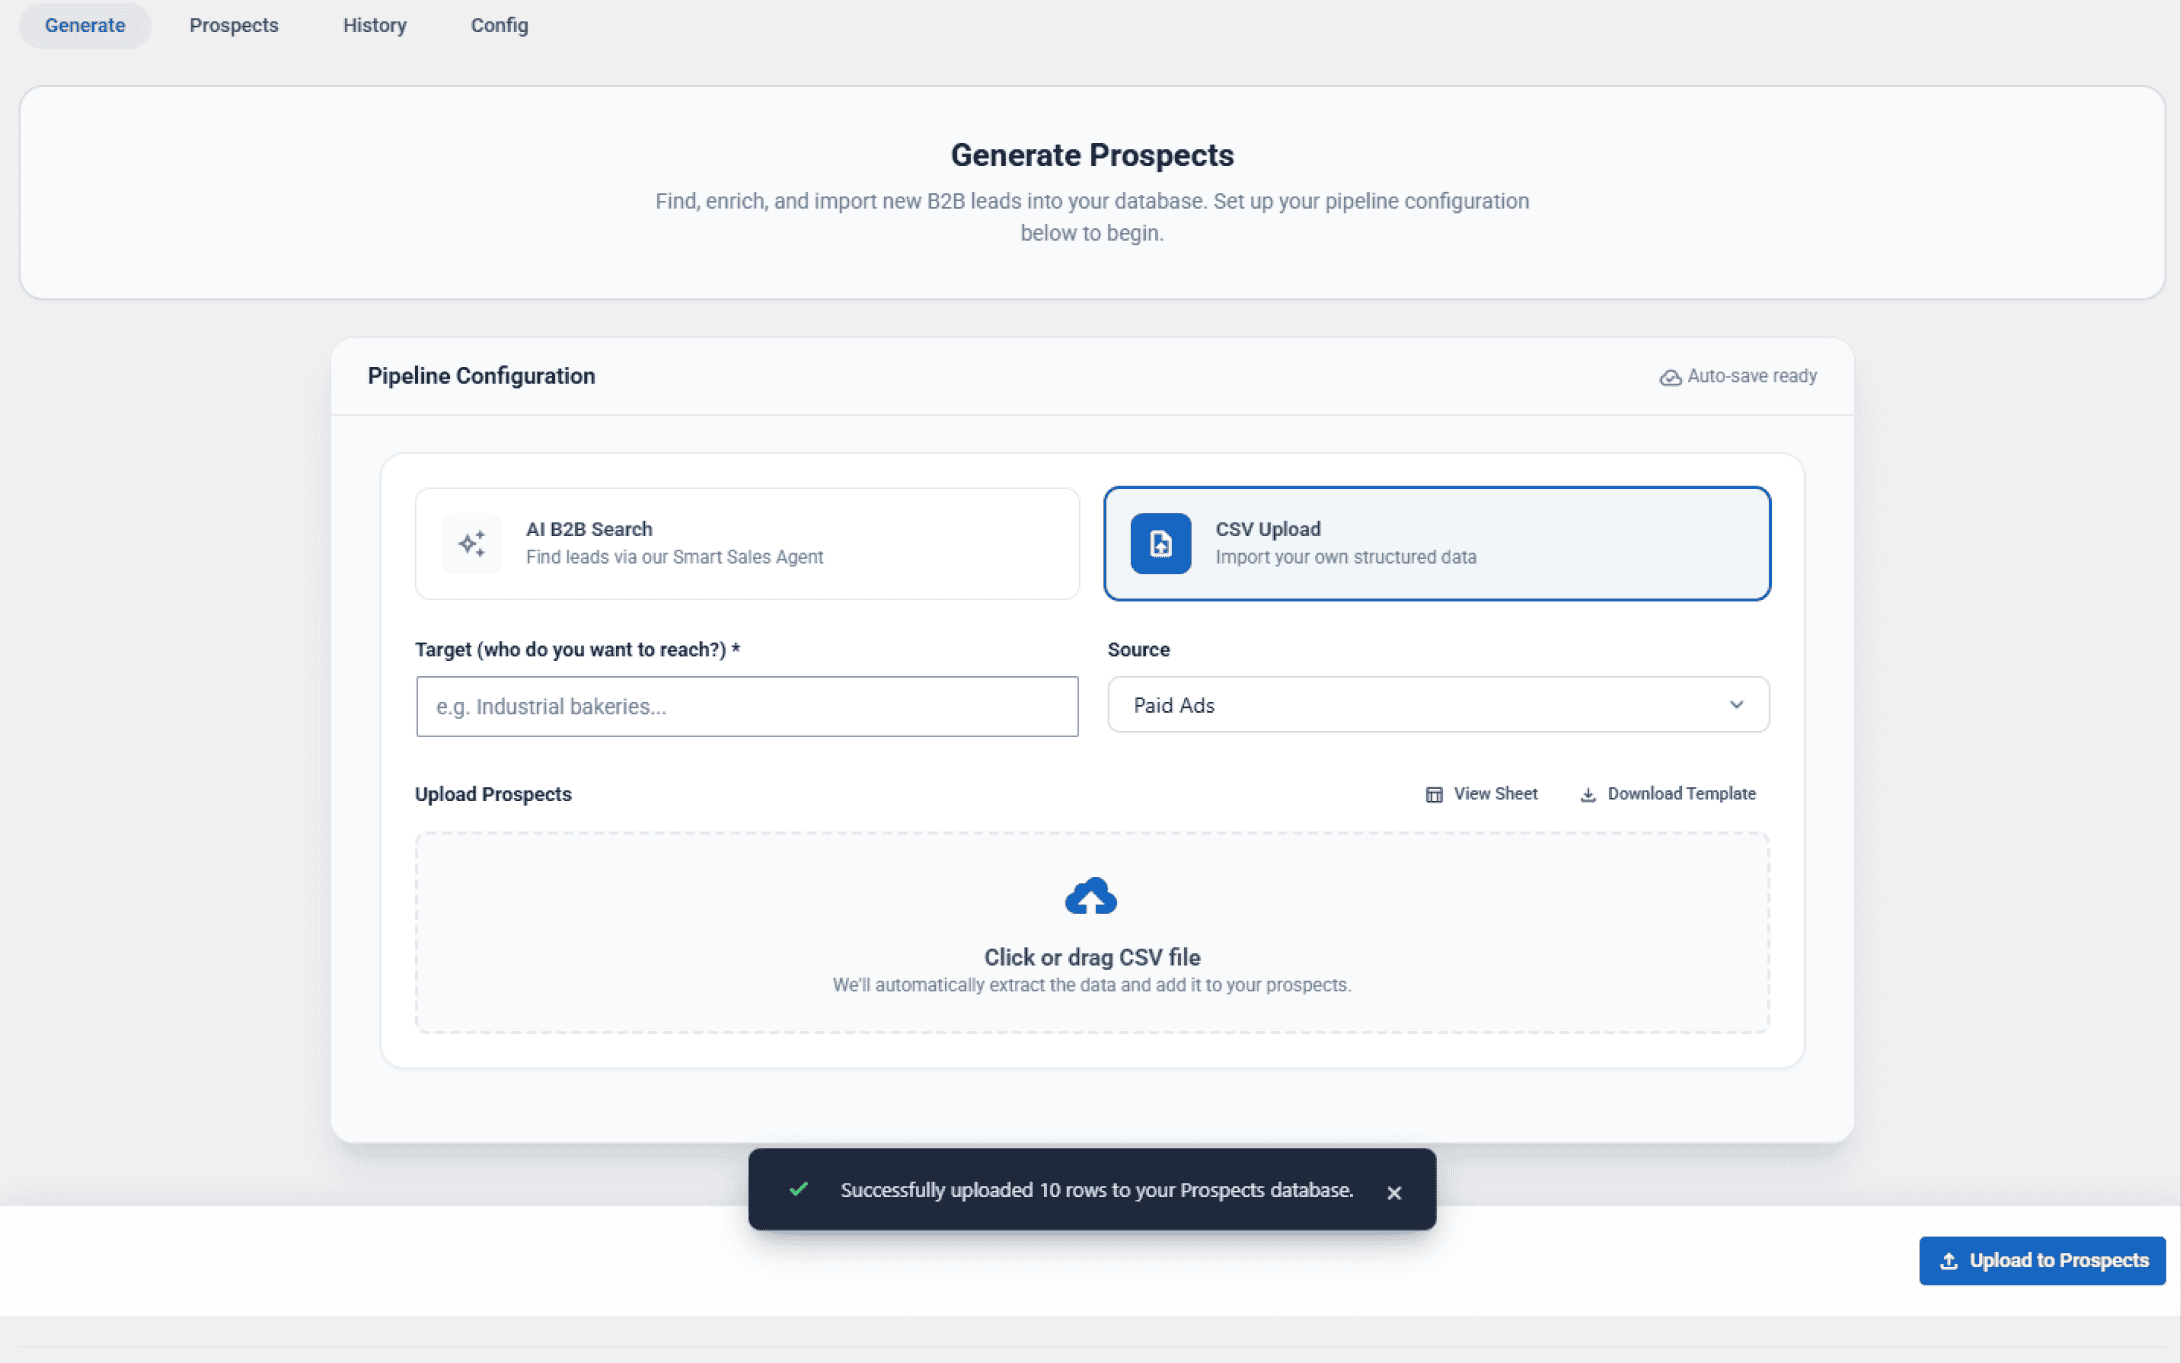
- A toast notification will confirm the successful insertion of rows into your CRM database.
If you upload a list with missing websites (leaving website_url empty), the cloud worker automatically executes a Google Search fallback using the Company Name and Location to detect the official website, contact info, and phone number before initiating enrichment.
4. Selecting Uploaded Leads & Running AI Sales Flow
Once imported, switch to the Prospects tab (B2B Prospects Database). Your uploaded records are stored in the local cts_crm table with initial data, notes, and manual contact details.
- Select one or more prospects using the row checkboxes.
- Click the Run Sales Flow button in the bulk action bar to dispatch the batch enrichment job to Google Cloud.
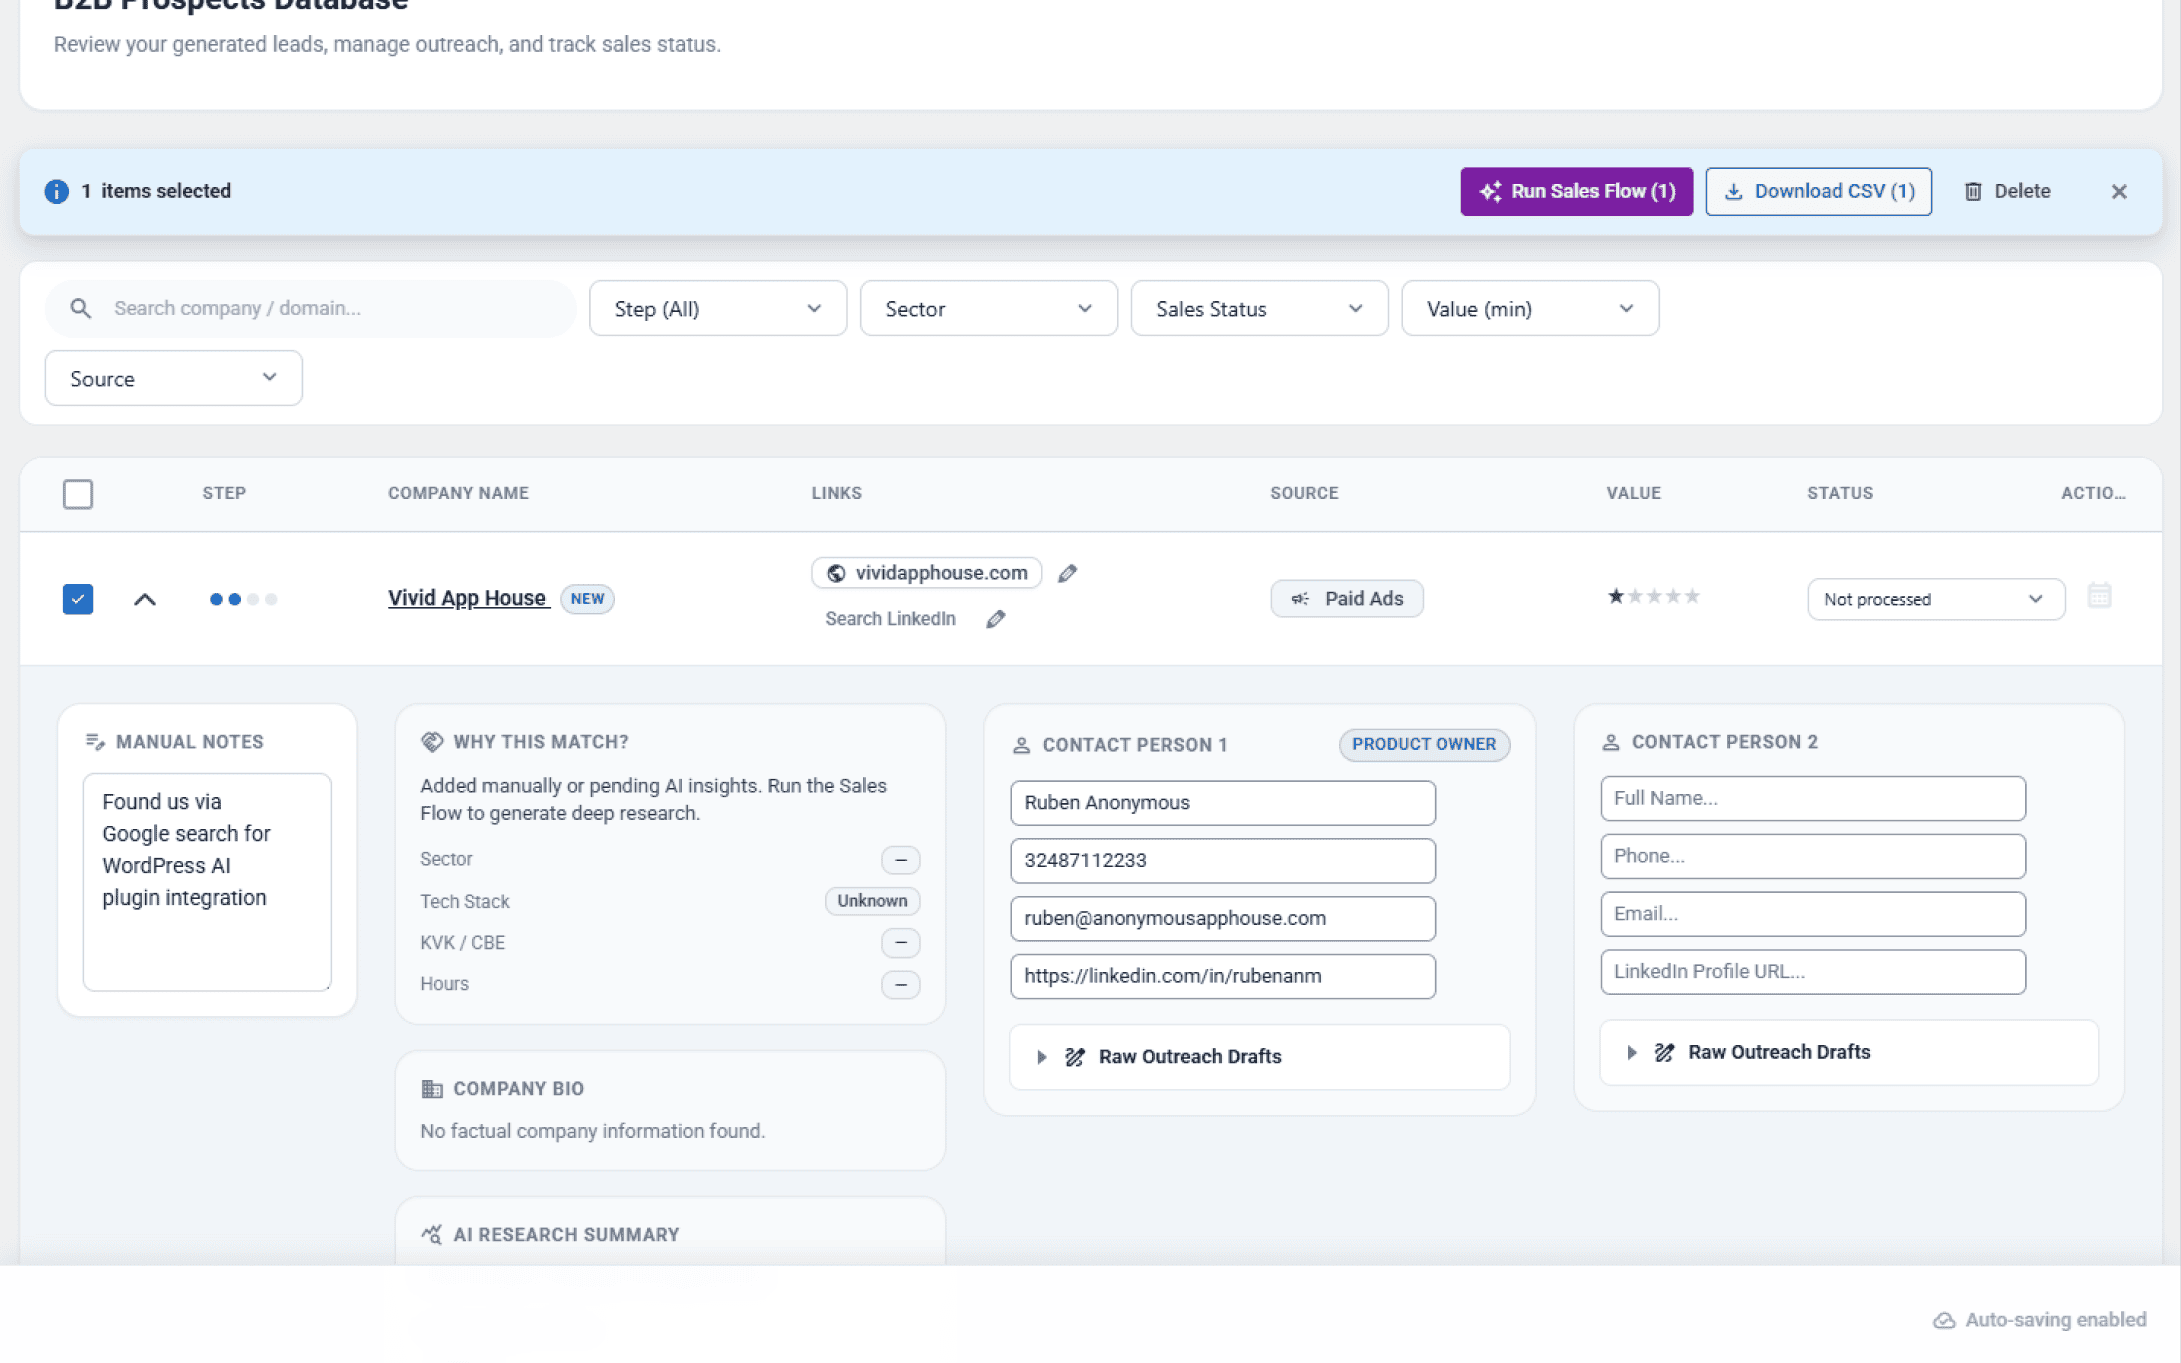
The worker crawls the site, performs deep analysis, and generates personalized Email Drafts, LinkedIn Messages, and Call Scripts directly accessible in each prospect's expanded drawer.